
Getting started with Momentum is simple. Here’s how you can easily jump in, and start making progress:
1. Start at the weekly planning level. This is the most accessible planning horizon for using the app as a beginner, and it’s easier for most of us to envision our week ahead than a month, or a quarter.
2. Pick your project(s). Decide on one (or a few) projects, which are the most important right now. Think week-sized projects, or part of a larger project that would take only a week.
Consider what you’ve focused on recently. Your job? Perfect, that’s a project. Working on your relationship? That's a project.
Pro tip: What projects have you dreamed about, but which never make it into your schedule? Example(s): “Write a book”, “launch a website”, “learn to paint”, “start meditating”, or “teach yourself a new language”. Which of these (or a week-sized chunk of them) could you move forward this week?
3. Start with the “constraints side” of the weekly planner. (That’s the left side on desktop, or the “Planner” on mobile.) It’s best to enter your constraints first, so you can see what’s already in play, and what will limit your ability to move your projects forward.
a) First, add your ‘Scheduled Events’ for the week. To truly capture your schedule for the week, along with planning time blocks for your projects (and their project chunks) you need to have the non-negotiable scheduled events that will be happening. Think: work meetings, PTA meetings, or date night. 🌝
Click on ‘ + Add Scheduled Event’ in the ‘Scheduled Events’ section.

You’ll see a dropdown section like this:

Now you can add your event, when it’s happening, and which Weekly Project it matches up with (if it does... it doesn't have to).
b) Next, add those projects. With those projects from step 1 in mind, find “This Week’s Projects” and click “ + Add Project.” (Note: You’ll be given the option to link that project to a Monthly project, but you don’t have to worry about that yet.)
Pro tip: When adding a project, start with a verb followed by a noun: “Weed the garden.” “Clean the garage.” “Draft the report.” “Outline the presentation.”
4. Check your ‘Dashboard’. Once you’ve set up a project or two in the Weekly Planner, move to your Weekly Dashboard (the right side). Now that you’ve entered your constraints (scheduled meetings and other events, plus projects), you can see how much time you have available for working on your projects each day.
a) Pick your main focus for the week. (It could be a project, area of focus, or a theme word or phrase.) 🎯

5. Create ‘Project Chunks’. Here’s where the important work happens. Knowing your projects for the week is great, but you need to break those projects down to be more doable. To quote Henry Ford, “nothing is particularly hard if you divide it into small jobs.” A good rule of thumb for a chunk is to use the two-hour rule. Pick chunks you’d be able to get done in two focused hours.
Click ‘+ Add a Project Chunk’ and give it a title. Same pro tip applies here: Verb+Noun makes a strong project chunk.

You can find more project chunking examples here.
Pro tip: Think just about the WHAT aspects of the project, not about WHEN yet. Put the pieces of the puzzle on the table before you start trying to put them together in the right way.
Pro tip: Look at what you’ve already added to any particular day. Here’s where a version of the 5 Projects Rule comes in: if you already have five things on your dashboard for that day (whether events or project chunks), you probably don’t have room to add another.
Advanced Steps for Project Chunks
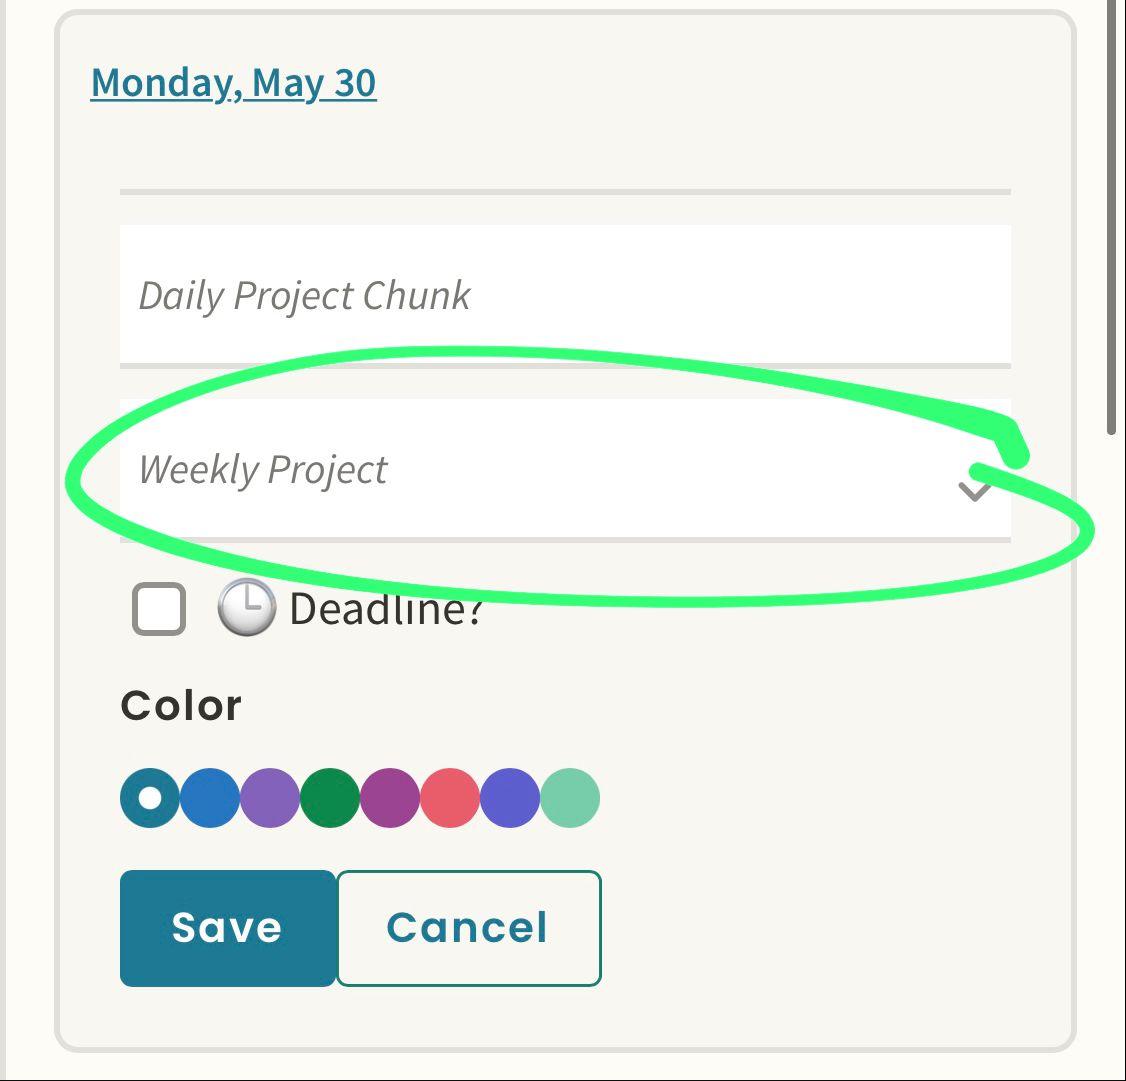
1. Link your ‘Daily Project Chunks’ to your ‘Weekly Projects’. When you’re adding your ‘Daily Project Chunk’ you’ll see the box gives you a dropdown box to link to any of your current weekly projects. (You can type the first few letters in the box, or used the down arrow on your keyboard to see the list of weekly projects.)
Hopefully because you thought about your overall project priorities for the week when you added your projects, it won’t be too difficult to link those chunks to the projects they support.
2. Add a deadline if you wish. If you know something is due on a particular day this week, you can add a deadline if it’s helpful for you.
3. Link your project and chunks visually with color. If it’s helpful for you to see at a glance how your project chunks and projects connect, you can choose a color for them when you create them (or add one later, via the edit function).
Yes, there's plenty more to Momentum Planning in the app. You have Quarterly, Monthly, Weekly, and Daily planning in your future — plus experiencing the power of how they all link up.
But starting out, stick to the weekly planner, try it for a week, and see how much more you get done. And not just checking off a bunch of tasks — but moving your most important projects forward. 😎

Writer & Content Creator at Productive Flourishing and Momentum. She's passionate about our climate, nature, foreign languages, and discovering uncharted places.

.png)
.png)